1Give an agent access to your DrawMode project
An MCP connection lets Claude Code or Codex read and edit the diagrams in a specific project. Each MCP config is for a single project.
- Open the project and choose MCP ▸ Connection keys….
- On the web, make a key and give it the agent's name. On the desktop, skip this — no key is needed.
- Copy the config for your agent and put it in the project's repository.
Every clone of the repo then connects to the same project.
2Connect your desktop and web account
This gives the desktop access to your personal library from the webapp and your plan. You only need to do this once per desktop — it is not project specific.
- On the web, choose Avatar menu ▸ Connect desktop apps…, then Connect a desktop…. Copy the key.
- On the desktop, choose Avatar menu ▸ Connect to web account…. Paste the key and save.
Each computer gets its own key. Revoke a key on the web to disconnect that computer.
3Move your project to a Git repo
On the desktop, a project can live in your repository next to your code.
- Open the project.
- Choose Git ▸ Move current project to repo… and pick the repository.
The project is now a drawmode-diagrams folder at the root of the repository. Commit it with
your code. Branches merge in a way that can never cause conflicts.
1Introduction to DrawMode
Draw with Shift
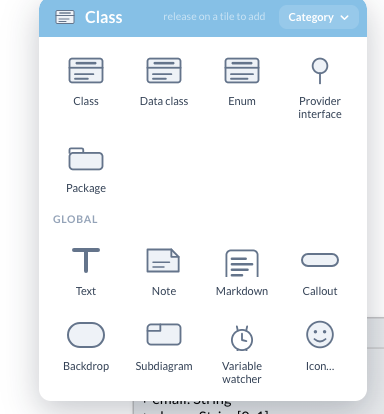
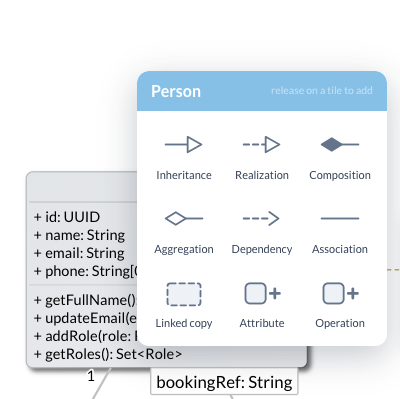
Everything on a DrawMode canvas is drawn with one gesture. Hold Shift and a menu appears where your pointer is. Over empty canvas it offers the shapes of the diagram you are in; release on one and it is placed under the pointer. Over a shape it offers that shape's relationships and additions: pick a relationship, then click the shape it should reach, and the link lands between them. There is nothing to drag from a palette and nothing to remember — the right choices are always the ones under your hand.
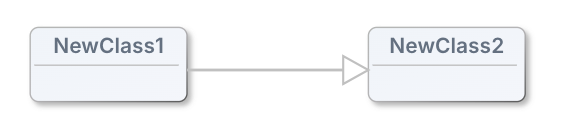
A model built from deltas
Underneath, DrawMode keeps every diagram as a model and records every change to it as a small delta. That one decision is what the rest of this guide builds on. On the web it is what lets a whole team edit the same diagram live, each person's changes merging with everyone else's. It is also what lets agents join in as collaborators: Orville and the owls, and Claude Code or Codex over MCP, each work on the model with their own undo and redo, and every stretch of their work is filed in the project's ledger — who changed what, and why.
Web and desktop
DrawMode comes as a web app and as a desktop app, and they are the same editor. The web is built for collaboration: shared projects, live editing, team chat and groups. The desktop is built for Git: your projects are plain files in your repository, branches merge, and nothing leaves your machine. Connect the two (section 3) and the desktop shares your web account's personal library and your plan. Both can be reached by coding agents over MCP (section 2).
The assistant differs in one way. On the web, Orville runs on DrawMode's own integrated models — Medium and High, both on GPT-6 Luna today — so there is nothing to set up. On the desktop you bring your own OpenAI key, which puts you in full control of the models and of every AI interaction: nothing goes anywhere you did not choose.
2Working with Claude Code or Codex
MCP, the Model Context Protocol, is how a coding agent such as Claude Code or Codex reaches your diagrams. DrawMode opens an MCP door that the agent reads and writes through; it then works from its own terminal while you watch the canvas. MCP is part of the Professional plan, and every new account's 14-day trial includes it.
On the web
Open the MCP menu in the header and choose Connection keys…. A connection is scoped to one project, by id, so renaming the project never breaks a saved configuration. Make a key and name it for the agent — that name is how its work is filed in the ledger, so give a second agent on the same project a key of its own. The dialog then writes out exactly what your agent needs.
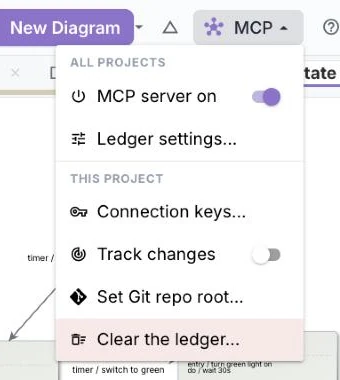
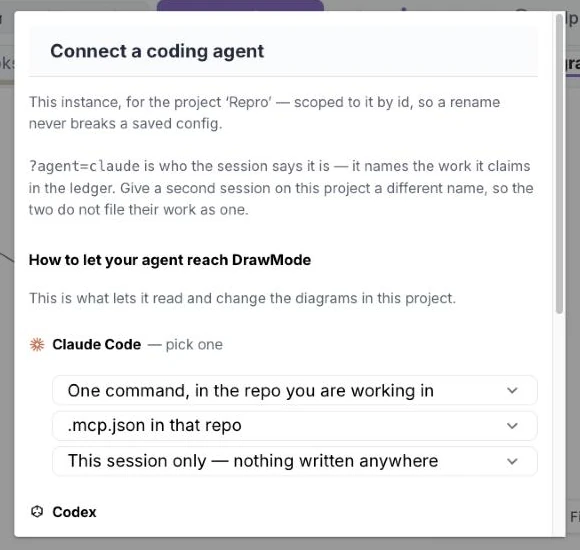
For Claude Code there are three ways, and they are alternatives:
- One command, run in the repository you are working in — the dialog gives it ready to paste:
claude mcp add drawmode 'https://app.drawmode.ai/mcp?project=…' \
  --transport http --header "Authorization: Bearer dmk_…"
- A
.mcp.jsonin that repository, which is the form designed to be committed. The entry names the project in its URL, so every clone — a teammate's, a build agent's — points the agent at the same diagrams. On a shared server the key is a secret: keep it out of the committed file and let Claude Code read it from an environment variable, or use the next way. - This session only: a launch line that configures the server for one session and writes nothing anywhere.
For Codex it is a few lines in ~/.codex/config.toml (or .codex/config.toml
in a trusted project), with the key either in the file or named as an environment variable:
[mcp_servers.drawmode]
url = "https://app.drawmode.ai/mcp?project=…"
bearer_token_env_var = "DRAWMODE_MCP_KEY"
Anything else that speaks MCP gets the plain facts from the same dialog: the URL, the headers, and that the transport is stateless Streamable HTTP.
On the desktop
The desktop's door is local to your machine, so there is no key: the computer is the boundary. The same
MCP ▸ Connection keys… gives the URL, which carries the project and the agent's name
(…/mcp?project=…&agent=claude). The desktop picks its port when it starts; if you want the URL to
stay the same between launches, pin it with DRAWMODE_PORT in the app's settings.env.
Source links on shapes
An agent that draws your code can pin each shape to the file it came from — a path and line from the
repository root, the same file:line it already writes. Hover a linked shape and a small
file icon with an arrow appears; click it and the file opens in your editor at that line. The editor is
set once per computer in Preferences… ▸ Code links — VS Code by default, with presets for the others and
a custom URL for anything else. Two shortcuts: middle-click a linked shape to open its file straight
away, which works even when the DrawMode window is in the background, and right-click any shape for
Open file link. On the web, tell the browser where the repository is on this computer with
MCP ▸ Set Git repo root…; on the desktop the links start at the project's Git root, so there is nothing
to set.
3Connecting the desktop to your web account
Connecting gives the desktop two things from your web account: your personal library — the documents you have vectorized, and the ones groups have shared with you — and your plan, so a Professional subscription made on the web is Professional on your desktop too.
- On the web, open your avatar menu and choose Connect desktop apps…, then Connect a desktop…. Name the computer and tick the groups that desktop may reach. You get a key.
- On the desktop, open the avatar menu and choose Connect to web account…. Paste the key, check the web app's address, and Save. The entry turns the app's colour once it is connected.
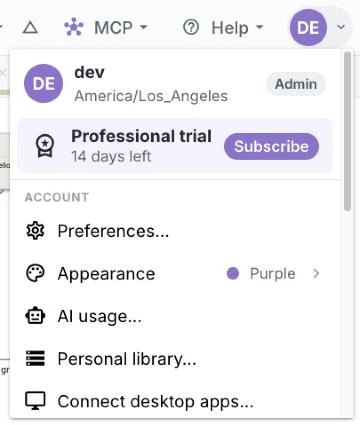
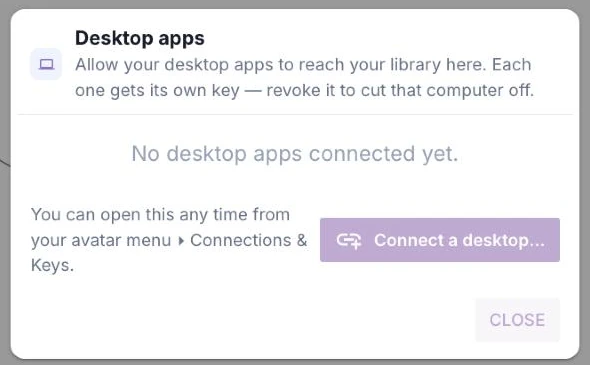
The key is per desktop. The web lists each one with the groups it reaches, when it was made and when it was last used; change a key's groups, show it again, or revoke it, and that computer is cut off at its next call — the others keep working. The desktop checks its plan with the web about once a day and keeps the last answer, so being offline never takes Professional away.
4Using with Git
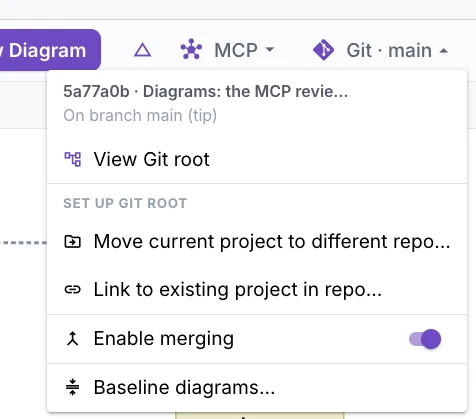
The desktop's header has a Git menu. It lights up in the app's colour once the project's root is a Git repository, and it holds everything Git-related: View Git root, then under Set up Git root Move current project to repo… and Link to existing project in repo…, then Enable merging and Baseline diagrams….
Setting the Git root
A new project lives in DrawMode's own files. To put it in a repository, choose Move current project to
repo… and pick the repository (or any folder inside it): the root is the folder holding .git,
and the project moves into drawmode-diagrams/ at that root. To pick up a project a repository
already holds — a teammate's, or your own clone on another machine — choose Link to existing project in
repo… and it joins your projects. Code links start at the root, so a shape's src/app.py:42 opens
the same file in every clone.
How diagrams are stored
your-repo/
├── .git/
├── src/ …
└── drawmode-diagrams/
    ├── .gitattributes                    *.jsonl merge=union
    ├── drawmode-project.json             the project: name, variables, members
    ├── drawmode-project_deltas.jsonl     its log
    ├── Checkout_3f9a1c.json              a diagram's baseline
    ├── Checkout_3f9a1c_deltas.jsonl      its log — one change per line, appended, never edited
    └── …
Each diagram is a baseline — a plain JSON file, the same format as always — plus a log of deltas, one JSON object per line. A save appends a line; a load replays the log onto the baseline. The files are readable, diffable and reviewable in a pull request like any other code.
How merging works
Because a log only ever grows, two branches that both changed a diagram merge by union: Git keeps
both sets of lines (the .gitattributes rule does this for you) and DrawMode replays them in the
order they were made. Where both branches touched the same thing, the later change wins, field by field; a
rename on one branch and a move on the other both survive. A line replayed twice is recognised and applied
once, so a rebase or a cherry-pick is safe. After a merge, drawmode-cli check confirms the folder
is sane.
Baselining
Logs grow, but you never have to fold them: a log holding 10,000 deltas is perfectly workable, and a load
replays it in a moment. Baselining is tidiness, not maintenance. When you are sure no other branch still needs
merging — after a release, say, or on a repository with one long-lived branch — Git ▸ Baseline diagrams…
writes each diagram's replayed state into its baseline, empties its log and renames the files to the diagrams'
current names. It is one way, which is why it asks. The same fold runs from the command line as
drawmode-cli baseline, with --dry-run to see what it would do.
Turning merging off
If you only ever work on one branch, Enable merging can be switched off. Each diagram is then saved as one file and no deltas are stored, which is smaller and simpler — but a diagram two branches both change will no longer merge. While it is off the Git button wears a yellow ! as a reminder, and turning it back on resumes the logs from there.
5Team collaboration
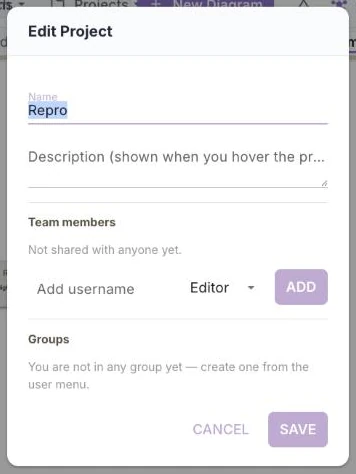
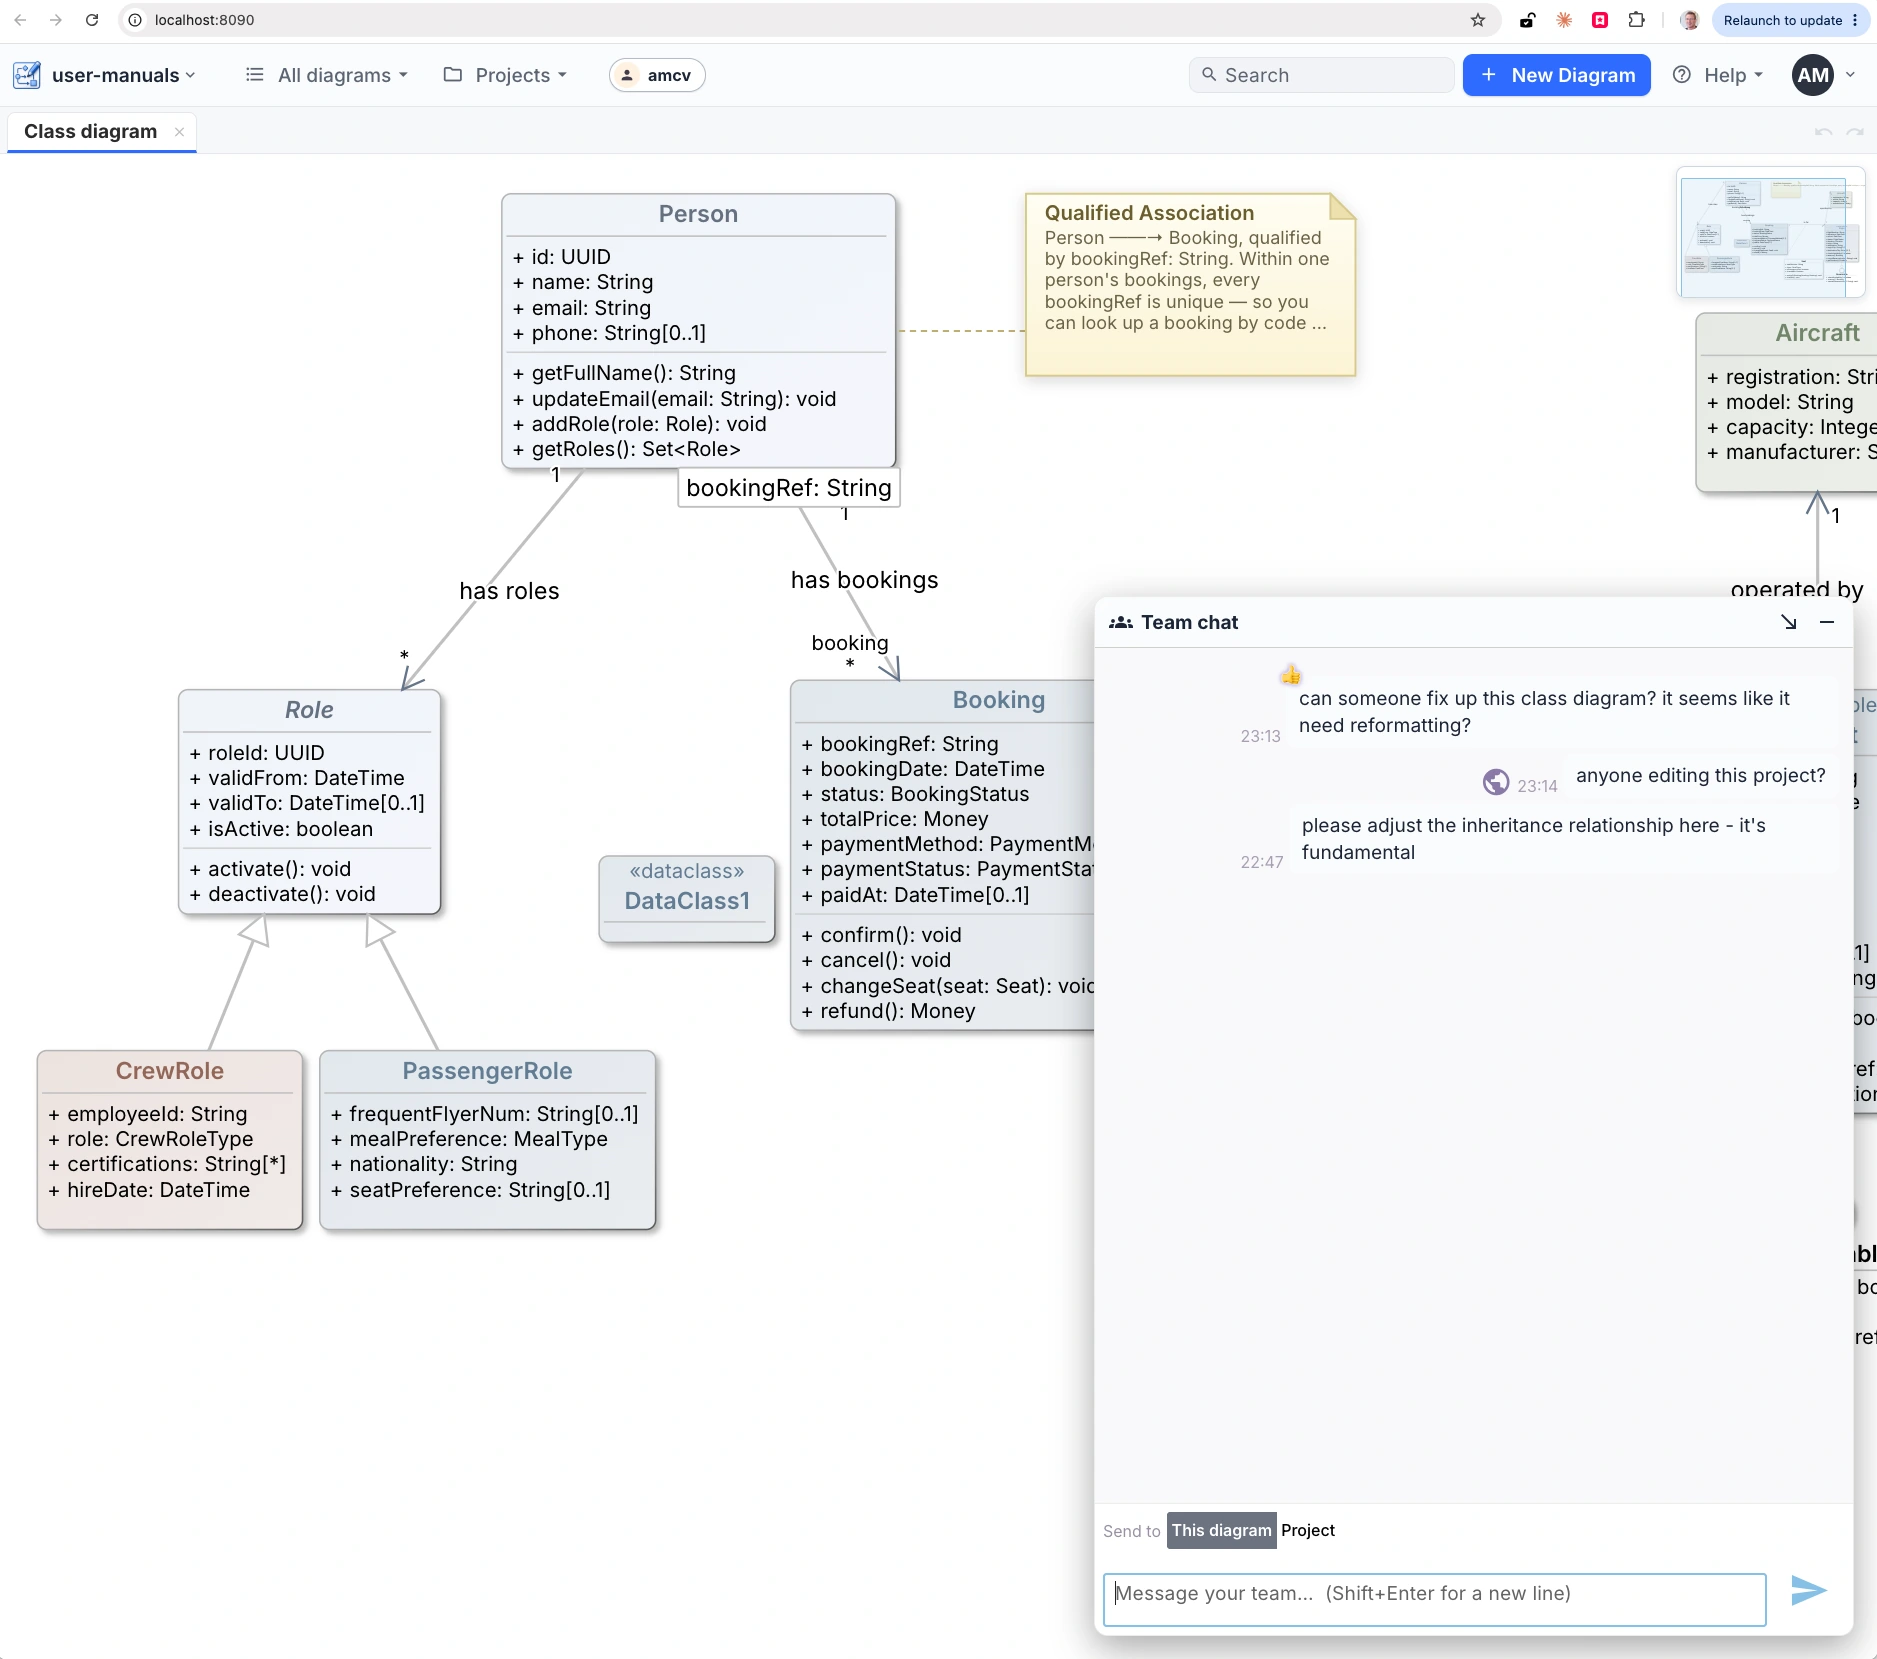
On the Professional plan a project is something a team works in together. Share a project from its Edit Project dialog: add people by username as viewers, editors or admins, or share it with a whole group. Everyone with access sees the same canvas, with each other's cursors, and edits land live for all of them; the project's team chat floats over the canvas. What others have shared with you is listed under Shared with you, labelled with who shared it.
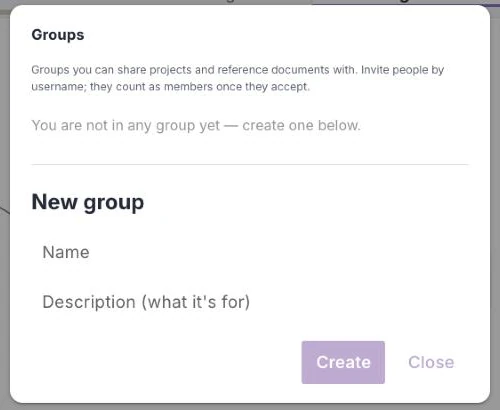
Groups
A group is a set of people you can share with as one: a department, a squad, a review board. Make one from the avatar menu's Groups…, invite people by username (they count once they accept, from Group invites…), and give some of them admin rights over it. Share a project with the group and every member has it; add someone to the group later and they have it too. Use groups to model how your company is organised, and share by group rather than one name at a time.
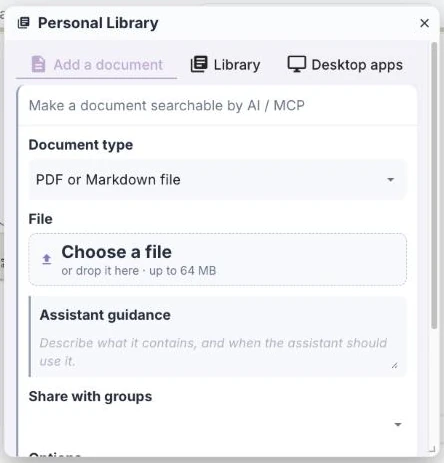
Your personal library, shared
The documents you vectorize in your Personal library — standards, design notes, specifications — are yours alone until you share them with a group. Shared, they are searched by your teammates' owls and by their agents over MCP, so a whole team's assistants answer from the same material. A document can be shared with groups as it is added, or afterwards.
6Command line tool
drawmode-cli is DrawMode for the terminal and for CI: fold logs, check a merge, export pictures
and text, and read the ledger, from a shell or a pipeline. On the desktop, the avatar menu's Install command
line tool… puts it on your PATH — /usr/local/bin on a Mac (one admin prompt), a per-user bin
folder on Windows and Linux (a new terminal sees it). It is a pointer to the installed app, so upgrading the
app never needs the install run again. For a build server with no app, pip install drawmode-cli
gives the commands that need no rendering engine.
Run it anywhere inside a repository and it finds the project in drawmode-diagrams/ at the Git
root; a path names another. With no command it opens a prompt that takes the same commands.
| Command | What it does |
|---|---|
baseline [PATH…] | Fold each diagram's log into its baseline, in place. --dry-run says what it would fold. |
check | Is this folder sane — conflict markers, a log with no baseline. Non-zero when it is not, so a pipeline can stop. |
export-png [PATH…] | Render each diagram to a picture, with the real engine (needs the app installed). |
export-svg [PATH…] | The same, as SVG. |
export-mermaid [PATH…] | Text export, for a pull-request body or a docs pipeline. |
extract-pure [PATH…] | The visual-free typed model, log replayed — for code generators and other tools. |
list | The projects here, or a project's diagrams. |
modifications | Who changed what, and why, from the ledger. --since, --message. |
version | Which build this is. |
Two options go before any command: -C FOLDER (or --use) names the repository to work
in, and --out DIR says where output goes. A diagram can be named, and a glob names several.
drawmode-cli -C ~/work/checkout check
drawmode-cli export-png 'Checkout*' --out docs/diagrams
drawmode-cli baseline --dry-run
7Administering a Company
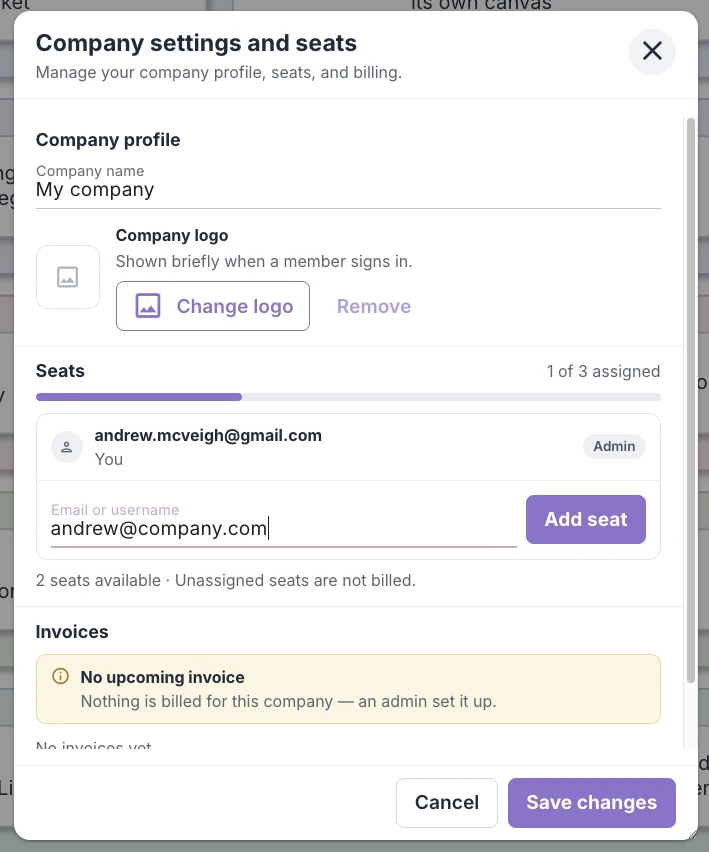
The Company plan is Professional for a team on one subscription. One person, the company admin, holds it and hands out seats; everyone holding a seat is Professional, and their plan row reads Company · your company's name. The admin's own seat counts as one.
Everything is in the avatar menu's Company settings and seats…: the company's name and a logo, which members see briefly when they sign in; the seats, where you add a person by email or username (an existing account has the seat at once, a new email is pre-approved and holds it until they first sign in), remove one, or reassign one from a person who has left to a person who has joined; and the invoices.
Billing
- $25 a seat a month, monthly only. You pay for the seats in use — there are no empty ones.
- Billing is pro rata. A seat added mid-month is charged for the rest of the month on the next invoice; a seat removed is credited the same way. Reassigning a seat costs nothing.
- The card on file is charged automatically each month. The dialog shows the next invoice as it stands, the latest invoices with their PDFs, and a link to all of them.
- Someone who already pays for Professional and is given a seat is told so, and can stop their own subscription with one click; it ends when its paid period does.
- Already on Professional yourself? Upgrade to Company… switches the same subscription, prorated, and a confirm step shows the exact figures before anything changes. There is no separate Company trial: the Professional trial is the trial.